Overview
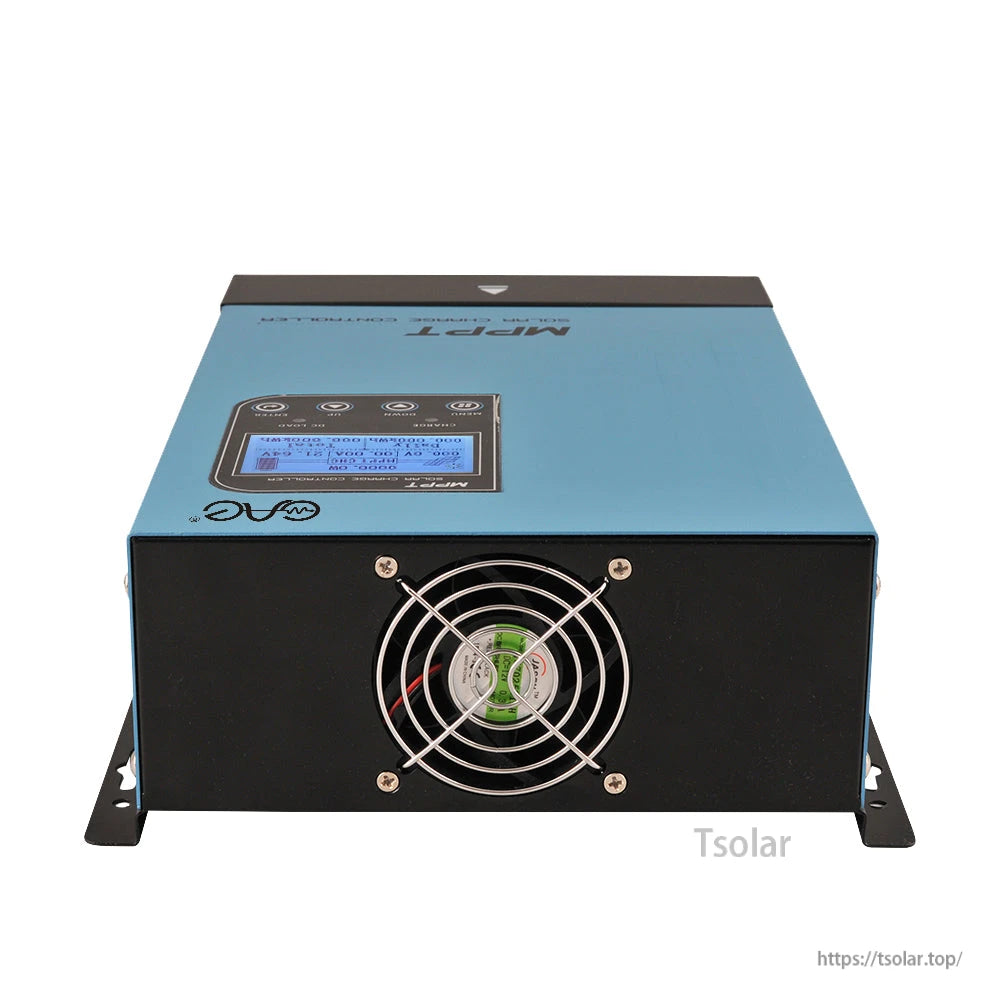
This 60A MPPT solar charge controller supports DC 12V / 24V / 36V / 48V battery systems and is designed to manage solar panel charging with MPPT control. It features an LCD & LED interface for real-time operating data display, and includes cooling fan operation for heat dissipation.
Key Features
- Advanced MPPT technology
- 99% converting efficiency
- DSP microprocessor control
- Capable of parallel output
- LED & LCD display
- Various charging mode supported
- Intelligent cooling system with inbuilt real-time temperature monitoring: < 42 C slow fan, > 45 C fast fan
- Air hole design to support airflow and reduce dust ingress
Connections & Interfaces
- PV input: PV MAX: 150VDC
- RS485 communication port: A / B / G
- Wiring terminals: Solar Panel (+ / -), Battery (+ / -), DC Load (+ / -)
- Temperature port label: TEMP
LCD Interface (Main Interface Description)
| No | Description |
| 1 | PV module voltage |
| 2 | Daily power generation (charging volume) |
| 3 | Charging power |
| 4 | Charging current |
| 5 | Battery capacity indication |
| 6 | Battery voltage |
| 7 | Total power generation (charging volume) |
| 8 | Date |
| 9 | Charging state: maximum power tracking, floating charge, stop charging |
| 10 | External temperature |
| 11 | Internal temperature |
| 12 | Battery Type / System Voltage Current Level |
| 13 | Real time |
Curve Screens (Display Items)
- Current screen: Current (MAX: 00.00A)
- Power screen: Power (MAX: 0000W)
- Current curve: Time (5:00 -20:00), Proportion: 1:10; records the highest charging current value of the day
- Power curve: Time (5:00 -20:00), Proportion: 1:1000; records the highest charging power value of the day
Specifications
| Controller type | MPPT solar charge controller |
| Series | MP-SERIES |
| Rated current | 60A |
| System voltage | DC 12V / 24V / 36V / 48V |
| Max PV input voltage label | PV MAX: 150VDC |
| Communication | RS485 (A / B / G) |
Installation & Safety Notes
- ALWAYS connect the battery first. Make sure sufficient battery voltage allows the controller to recognize the correct system voltage. NEVER connect the solar panel array to the controller without a battery. The disassembly sequence is opposite of the wiring order.
- DO NOT connect any inverter / wind / alternator or charger into the charge controller. Connect the inverter directly to the battery.
- Ensure solar input voltage is 3V or more higher than the battery voltage and total input power is within the supported range. If input power is too low, charging current may be near zero during floating charge.
- Charging indicator and charging current may switch on/off on cloudy days or in the evening when light is insufficient; this is normal.
- If the controller buzzes, the fan may be working to dissipate heat.
- DO NOT install the controller in direct sunlight to avoid power loss due to overheating. Clear clutter around the controller and keep adequate space for heat dissipation (approx. 20cm).
- Ensure all connections into and from the controller are tight. DO NOT allow the battery positive (+) and negative (-) terminals to touch.
For product selection help or after-sales support, contact customer service at https://tsolar.top/ or service@tsolar.top.
Details

Built for 12V/24V/36V/48V battery systems, the MP-SERIES 60A controller combines MPPT charging with a clear LCD/LED interface for quick status checks.

Clear terminal labeling helps keep wiring straightforward for solar panel input, battery connection, and DC load output, with RS485 available for communication.

The LCD menu displays key operating data at a glance, including PV module voltage, charging current and power, battery voltage, and temperature readings.
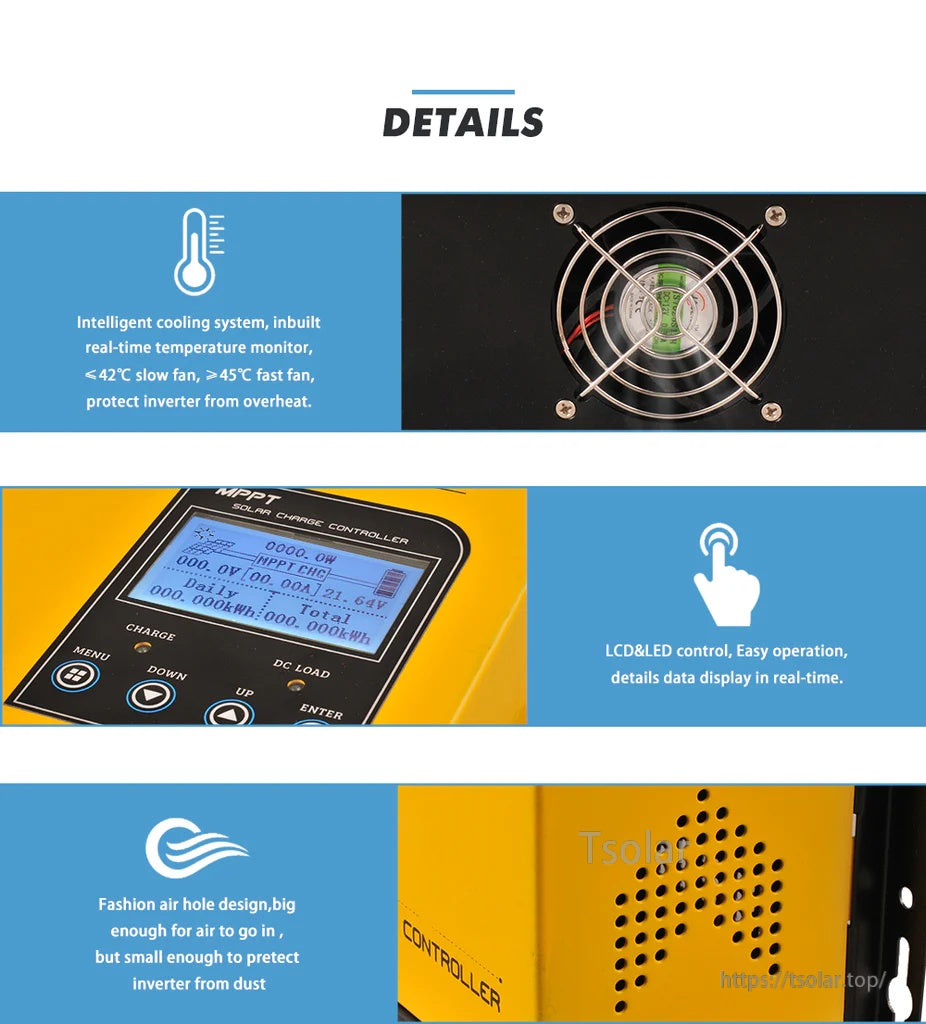
An intelligent cooling fan with temperature monitoring and a vented enclosure helps manage heat while keeping operation simple from the front-panel buttons.